Loading preview…
Blackwork Mandala with Intricate Ornamental Patterns
Blackwork
Explore tattoo stencil ideas, upload your artwork, and refine printable linework in the editor below.
Turn your ideas into custom tattoo drawings, try them on your body, and create editable stencils for your tattoo artist.
Choose a visual direction, or let the AI choose. Describe the subject and details in your prompt.
Files load in this browser first. Generating, converting or saving sends the required artwork to our processing services. Account designs can be archived automatically. How images are handled.
New here? Generate a design with AI or upload your artwork. Then preview it on your body or turn it into editable linework. You can use each tool directly with your own design.
No drawing skills required.
Free daily credits: 15 for guests · 15 with an account. Allowance details.
Generate: 10 credits · Realistic preview: 15 · Stencil: 10. Each is a separate task.
Choose a preset model and body area, or view the full-body model.
Convert your design to editable black-and-white linework. Adjust line thickness, reshape curves, remove marks and export a print-ready stencil.
Restoring your draft…
Blackwork
Minimalist
Ornamental
Traditional
Geometric
Neo-traditional
Japanese
Traditional
Minimalist
Dotwork
Watercolor
Watercolor
Fine line
Fine line
Fine line
Minimalist
Minimalist
Minimalist
Fine line
Fine line
Minimalist
Minimalist
Minimalist
Fine line
Start with a clear drawing, a generated design, or one of the selected stencils. Uploading your own artwork opens the same workflow without requiring a new design. Keep the original image available: color, shading and solid fills may explain details that an outline alone cannot communicate.
Choose Create Tattoo Stencil to convert an uploaded design. The studio shows the current credit cost before you proceed. An existing gallery stencil can be opened for editing without generating the same image again. Inspect the result before deciding whether another conversion is needed.
Select a line to change its thickness, reshape a curve or delete an unwanted detail. Use Draw to add marks and Remove stray marks to clear small specks. Work on one area at a time, compare against the original, and use Undo when a change removes useful structure.
Save an editable SVG for further changes, or set the tattoo width and paper size before exporting a PDF or PNG. Print at actual size or 100% and check the output dimensions. Keep the artwork and linework together when discussing practical adjustments with your tattoo artist.
This example pairs the original red and blue butterfly with its matching stencil. Compare the wing outline, the internal pattern and the open areas between marks. The stencil separates selected edges from the color plan; it does not reproduce every tonal transition. A dark patch in the original may need a boundary rather than many tiny internal lines.
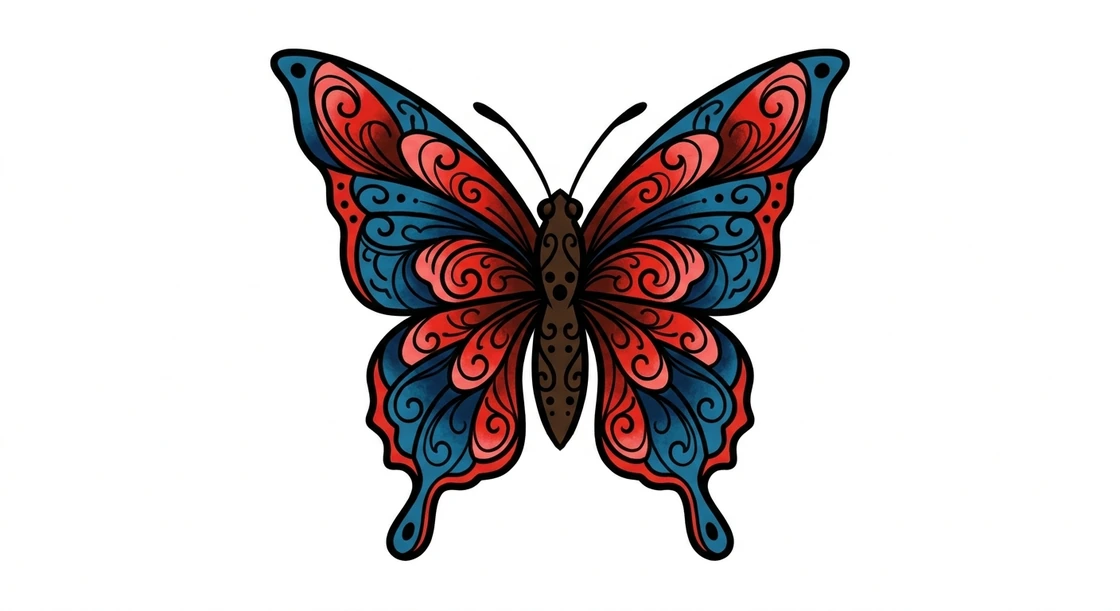
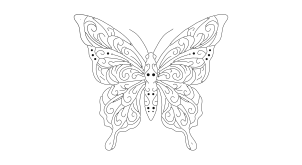
Open the SVG example to inspect how the lines describe the same composition. Use it as a reference for evaluating your own conversion, rather than assuming that more lines always produce a better stencil. The useful result preserves the subject's structure while leaving the artist a readable guide to the intended design.
Download example SVGFor a cat or another animal, begin with the silhouette, ear placement and the way the tail joins the body. A few clear contours can communicate the pose more effectively than a dense collection of fur marks. Check the head and paws at the width you intend to print, rather than judging only the enlarged canvas.
In the editor, remove isolated specks and simplify overlapping marks only when you understand what they represent. Compare the original after each substantial change. A sparse outline and a solid silhouette require different references; converting one into the other is a design decision, not merely a thicker line setting. Ask your artist which features should remain at the intended scale.
Ornamental tattoo stencil ideas often depend on repeated curves, balanced spacing and deliberate open areas. Follow a repeating shape across the design and check where it changes direction. A mismatch that is easy to miss in a colorful reference can become obvious when the image is reduced to black lines on white.
Use line selection and curve editing to examine individual contours. Avoid thickening every mark equally: nearby lines may merge, and small gaps may disappear. Review the outer shape separately from the internal pattern. If the design wraps around a body area, use try-on to discuss orientation, then confirm its actual width through the print settings rather than estimating centimeters from a photo.
If you already have a sketch, start by uploading that drawing instead of generating a replacement. A clean image with the complete subject and a plain background gives you a clearer starting point. Remove unrelated borders or surrounding objects before upload when they would make it harder to identify the intended design.
Compare the converted stencil with the drawing and note the details you want to preserve. Keep important tonal or color references alongside the linework. Export an editable copy before experimenting with simplification, and prepare a sized PDF for discussion. Your artist can then assess line spacing, proportions and placement using the same reference, rather than trying to reconstruct your intention from a preview alone.
An outer contour, a fold and a patch of shading do different jobs. Keep the lines needed to recognize the subject before adding texture. In a portrait or shaded design, the stencil may mark selected landmarks while the original carries the remaining information. Do not treat every dark pixel as a necessary transfer line.
Zoom in on intersections, joined stems, wing edges and small facial features. Look for doubled contours, disconnected ends or marks that imply an extra feature. After a local correction, zoom out again to check the composition. A tidy detail is useful only when it still belongs to the whole design.
The amount of detail visible on screen changes when the design is reduced. Choose a width in the print controls and check whether neighboring lines remain distinct. There is no single minimum size suitable for every stencil. Let your artist assess the particular drawing, its spacing and the area where it will be used.
Yes. Upload a PNG, JPEG or WebP design in the studio above. You can start from your own artwork without using the generator. Use a clear reference showing the whole subject, and only upload artwork you have permission to work with. The conversion and editing steps remain available in the same workspace.
No. Edit stencil opens the selected artwork and its available linework in this page's studio. Opening the design is separate from generation. If a later action needs processing, the studio presents that action and its current credit cost before you start it. You can also download the existing stencil image directly.
The stencil editor provides line selection, thickness adjustment, curve editing, drawing and deletion. These controls apply to editable stencil paths, rather than turning every part of the original colored image into an editable illustration. Check the surrounding lines after changing one stroke, especially where contours are close together or intersect.
Use the editor's tattoo width and paper-size controls, then export a PDF or PNG. Select actual size or 100% when printing and measure the output. Automatic fit-to-page settings can change the intended dimensions. A photo try-on is a placement reference, so it cannot replace this separate size check.
A stencil is a linework guide for reviewing and preparing a design with an artist. A temporary tattoo is a separate printed product using its own production artwork. Downloading a stencil does not place a physical order, and a black-and-white outline should not be assumed to represent the full color design you might want printed.
Start with the artwork you want to keep. Refine its lines, check it at print size, and bring the original and stencil to your artist.