To create a tattoo stencil from an image, upload the original artwork, choose Create Tattoo Stencil and inspect the resulting black-and-white linework. The editor lets you adjust thickness, reshape curves, delete lines and draw new marks. Save editable SVG for later path editing, or set a print width and export PDF or PNG. Review the linework with your artist before using it for transfer preparation.
- Choose a clear source. Open the studio and choose Tattoo Stencil Editor. Upload a clear design with enough detail to distinguish important contours.
- Convert and inspect. Create a stencil and compare the result with the original motif.
- Refine and keep both formats. Edit the paths, save SVG and export a printable file at a deliberate size.
How to create a tattoo stencil from an image you already have
A design image and a body mockup serve different purposes. Use the original drawing as the stencil source, rather than a photograph of that drawing wrapped around an arm. A mockup can include skin texture, shadows and perspective that do not belong in flat transfer linework. Keep the artwork separate even if the try-on is the version you show most often.
Choose Upload your design and load a PNG, JPEG or WebP file you have permission to process. A clear image with a plain background is easier to inspect than a heavily compressed screenshot. Check that the complete motif is inside the image and that no toolbar, caption or border could be mistaken for part of the design.
You can skip AI design generation when you already have artwork. Create Tattoo Stencil is its own task, with a cost shown before you submit. Conversion aims to produce useful linework; it does not establish that every shaded area, tiny dot or overlapping detail has been interpreted correctly. Keep a download of the original alongside the generated stencil.
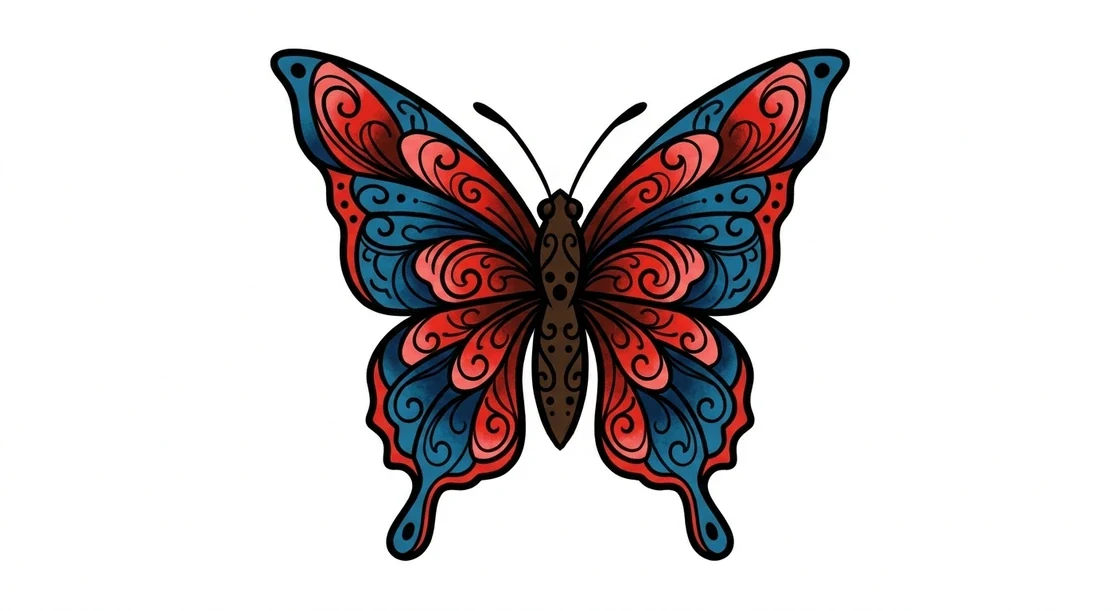
Use the design image, not the body preview, as the source of the stencil.
Inspect what conversion kept and changed
Look at the silhouette first. Compare the ends of stems, tips of wings and other outer contours with the original. Then examine important interior boundaries. A conversion can simplify a region or introduce a mark that looks plausible at a glance. Work through the design in sections rather than assuming that a finished preview means the inspection is complete.
Color and shading do not translate into a single obvious set of lines. A line can represent an outer edge, an internal form or a guide to a shaded region. Decide which information your artist actually needs. Removing all small details is not automatically an improvement, and preserving every visible texture can create an unnecessarily crowded transfer reference.
If the system reports a conversion error, read the message and keep any offered stencil-image download. A raster result and editable paths are different stages. An available black-and-white image does not necessarily mean path conversion has completed. Retry the indicated step when appropriate rather than repeatedly generating a new design and losing the original direction.
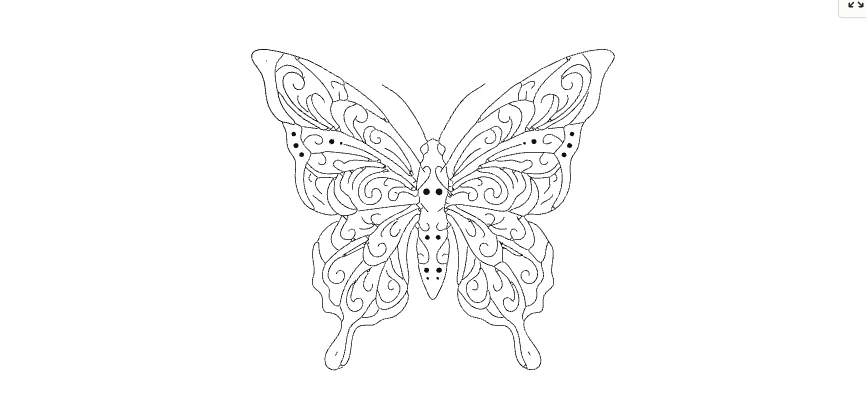
Inspect meaningful contours and isolated dots before cleaning the linework.
Edit individual paths deliberately
Use Select to choose a line. Adjust Line width when its weight is inconsistent with neighboring contours. Edit line shape exposes points for reshaping a curve; Delete line removes a selected unwanted mark. Split line here is available when a selected point supports that operation. These controls edit the stencil paths, not the original color illustration.
Draw lets you add a missing mark. Work at a comfortable zoom and compare the addition with the rest of the motif. Remove stray marks helps clear small specks, but review the result because a deliberate isolated dot can be visually similar to noise. Undo is useful immediately after an edit that removed more than you intended.
Avoid using cleanup as a substitute for examining the design. A cleaner image can still contain the wrong curve or a gap in an important contour. At the same time, do not join separate lines merely because they sit close together. The goal is intentional structure that an artist can interpret, with enough separation to remain readable at the intended size.
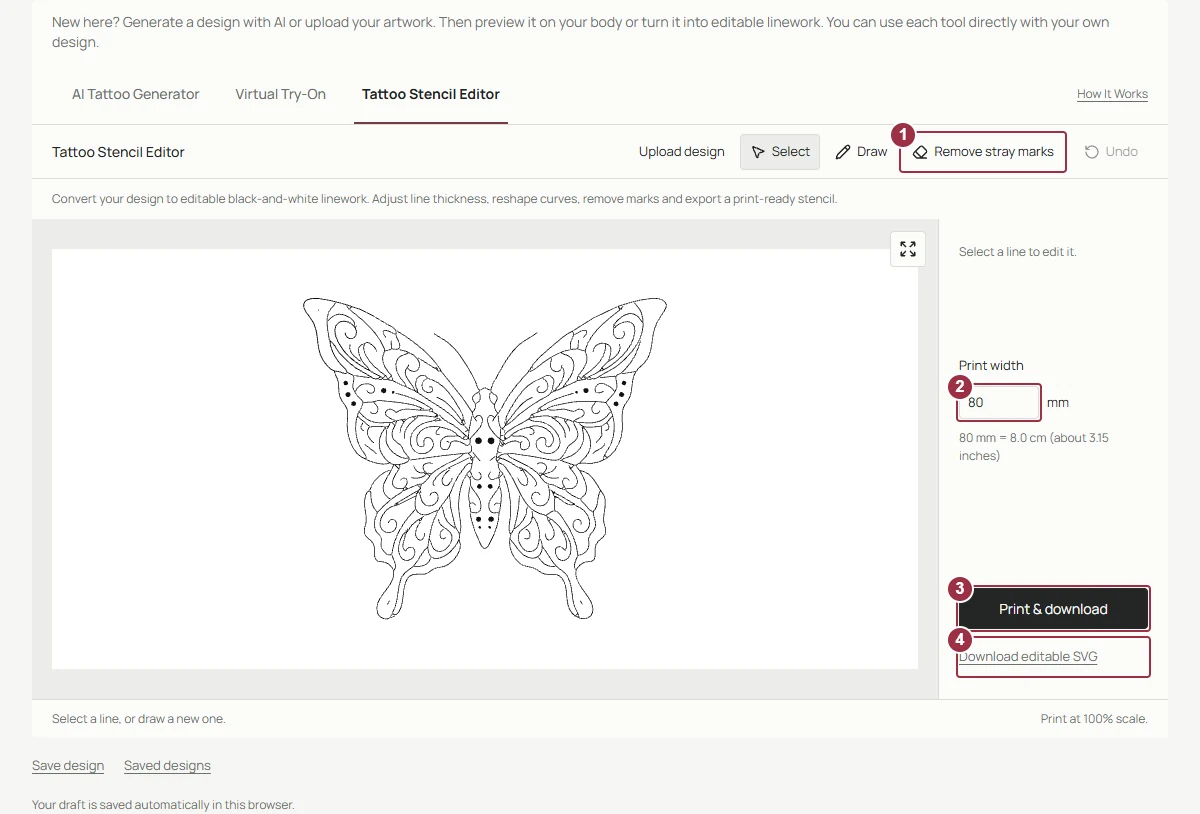
The stencil editor changes black-and-white paths, with the original motif retained for comparison.
Choose an editable or printable output
Download editable SVG keeps vector paths for another editing session in a compatible editor. SVG describes shapes rather than only a fixed grid of pixels. Keep this file if you expect further line changes. A PNG is a raster image and cannot retain the same individual path-editing controls merely because it looks identical on screen.
Print & download opens the paper layout. Enter the physical tattoo width in millimeters and check the resulting dimensions before exporting PDF or PNG. File appearance alone does not establish printed scale: the next application or printer may resize it. Save an editable copy as well as the file your artist prefers for the next step.
Common questions
Is an editable stencil a full drawing editor?
No. It is a black-and-white linework editor. It can adjust paths and marks, but it does not make every shaded or colored feature of the original illustration independently editable.
Can I convert a photograph?
You may upload a supported image, but a complex photograph can contain many edges that are not useful transfer lines. Review the result and ask your artist which structural boundaries should remain.
For the underlying vector format, see W3C's introduction to SVG.
Continue with your design
Use the illustrated Tattoo Drawings walkthrough for the complete product workflow, or open the studio with your own idea. Browse all tattoo design guides for related tasks.
Next: Prepare the finished stencil for actual-size printing.