To try a tattoo on your body, load a design, choose a built-in model or upload a clear photo, then move and resize the artwork over the intended area. Download mockup saves the arrangement without skin blending. Create Realistic Preview is an optional processing step. Both help you compare placements; neither predicts the exact appearance or physical size of a finished tattoo.
- Choose the artwork and photo. Open the studio and choose Virtual Try-On. Upload a design, then select a preset model area or your photo.
- Compare the placement. Move, rotate and resize the tattoo while checking the wider composition.
- Save the right preview. Download a mockup, or request a processed preview and save that result separately.
How to try a tattoo on your body with a clear photo
Start with the same design for each comparison. An image with a plain background is easier to read against a body photo than a screenshot with menus, a page border or several designs. Upload your design in the studio if it already exists. You can open Virtual Try-On directly; generating new artwork is not a requirement for using your own file.
The built-in male and female options are preset models. They do not ask you to declare your gender or body type. Switch Front and Back and choose an available body area to see a closer view. View Full-Body Model gives the wider model image. This is useful for comparing the overall balance before considering personal photographs.
For your own image, choose a clear, well-lit view with the intended area visible. A photo with clothing over the target, a cropped limb edge or strong perspective makes placement harder to judge. The tool cannot reveal skin that the photo does not show. Keep a wider version of the photo if you want to compare the design with the surrounding composition.
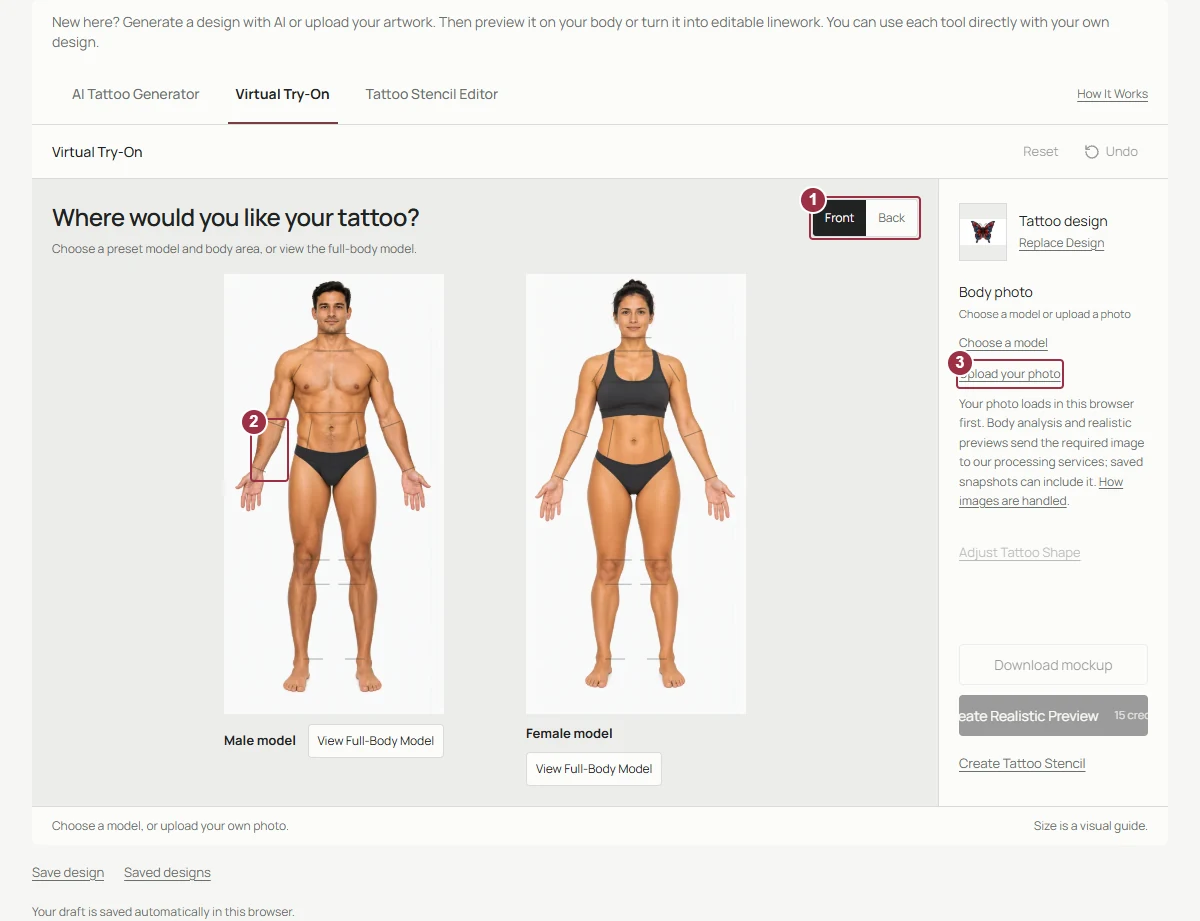
Preset models let you explore a placement before deciding whether to use a personal photo.
Move the tattoo without losing the wider view
Drag the tattoo to move it and use the visible handles to change its size and angle. Zoom in when checking a small detail, then return to Fit to view so you can judge the entire arrangement. A design can look balanced in a close crop while sitting awkwardly against the body in the wider picture. Use both views before saving a favorite.
Adjust Tattoo Shape exposes fit points for refining the visible shape. Make small changes and watch the motif rather than stretching it until it merely fills the available area. Keep recognizable circles, petals or lettering in mind. A convincing silhouette is not helpful if the actual design becomes distorted beyond what you intend to show your artist.
Replace Design switches to another artwork file. It does not edit the details inside the current design. When comparing two motifs, keep the photo and viewing conditions consistent. When comparing locations, keep a copy of the artwork and note which placement belongs to which saved image. This makes the comparison easier to explain later.
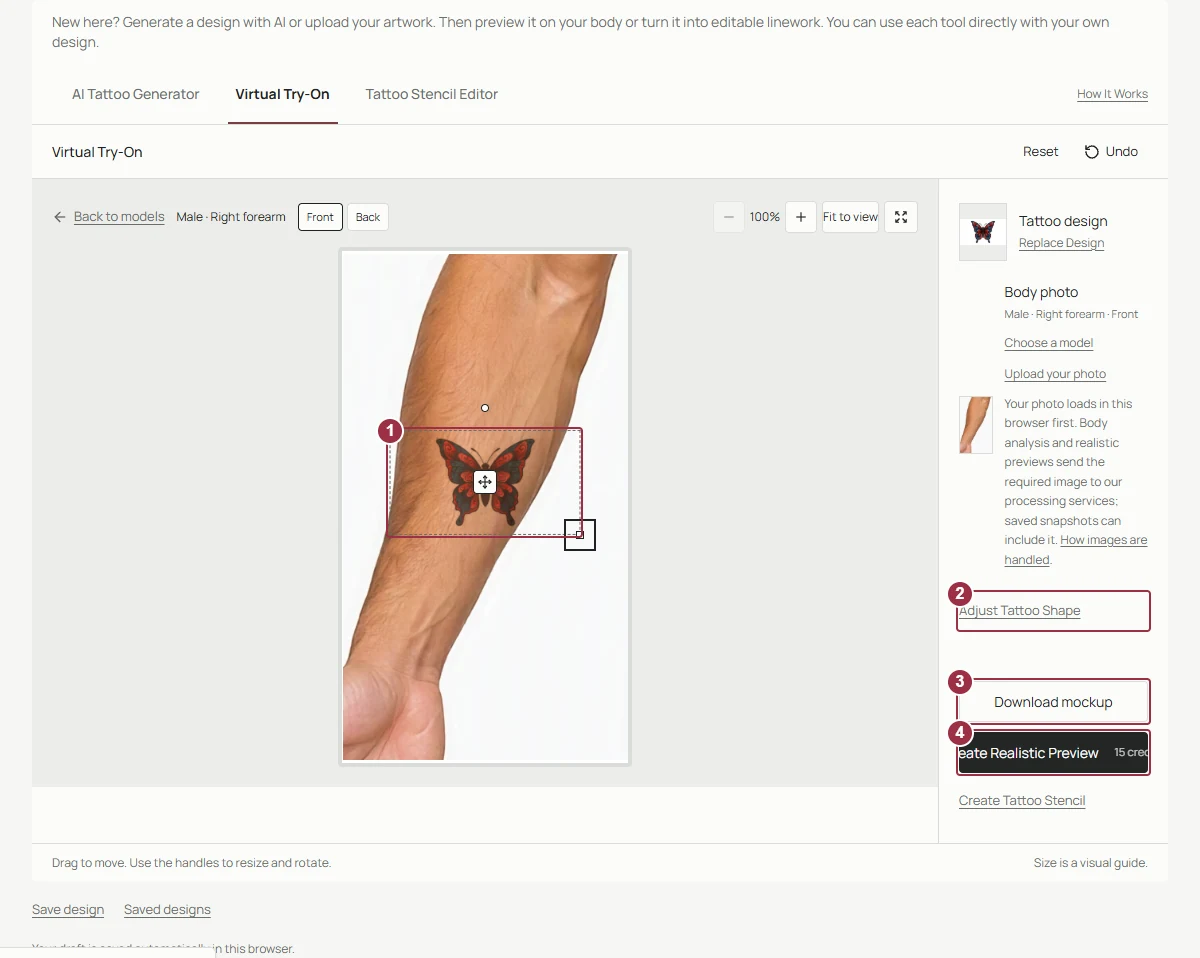
The controls change the arrangement in the photo. The displayed size is a visual guide.
Choose a mockup or a realistic preview
Download mockup saves the body photo with the current tattoo placement. It is useful when the question is simply whether the design should sit higher, lower or at a different angle. You do not need to process skin blending to download this arrangement. Make your basic composition decisions here before using another credit-based task.
Create Realistic Preview performs additional processing, including analysis of the selected body surface. Check the cost shown beside the action. When it finishes, Download preview saves the processed result. Keep a copy of the unprocessed mockup as well if you want to compare what changed. Use Adjust placement to return to the positioning controls.
A processed preview may still contain errors, especially around edges, overlapping objects or difficult surfaces. Inspect the design's orientation, outline and small details, and check the surrounding photo. Do not interpret a natural-looking image as an exact forecast of healed ink, skin response or tattooing technique. Discuss the design and placement with your artist.
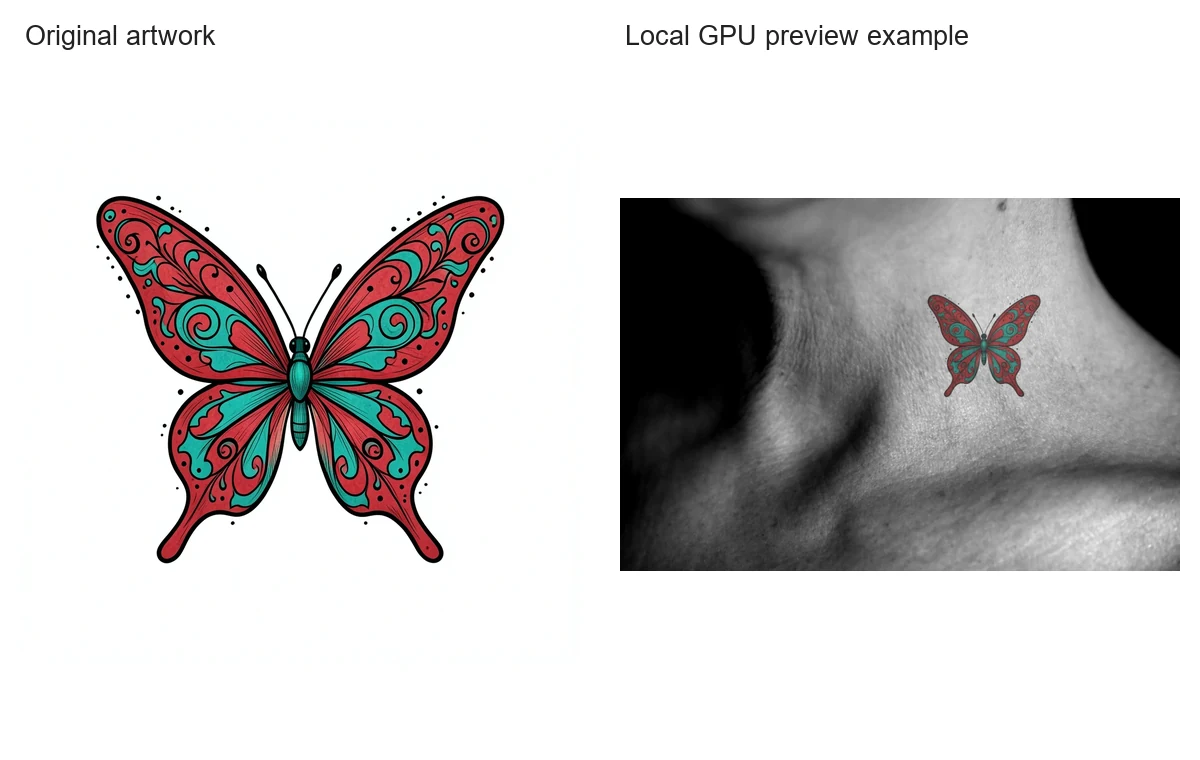
A separate, matched design-and-preview case from an earlier local GPU evaluation. The neck photograph is by Elements Of This World, CC BY 2.0; a tattoo preview was added. It does not guarantee a real tattoo outcome.
Keep privacy and print size separate
A personal photo first loads in the browser, but analysis, preview processing or a saved snapshot can send it to the service. Read the upload privacy note before proceeding. Built-in models offer an alternative when you only need a general placement comparison. Browser drafts and server account works are separate copies with different deletion steps.
A tattoo's apparent width in a photograph does not determine the stencil's physical dimensions. Camera distance and body perspective affect what you see. Set the intended millimeter width in the stencil editor when preparing a print, then check an actual-size paper copy with a ruler. Keep the preview as a composition reference rather than a measuring instrument.
Common questions
What if surface processing fails?
Keep the current placement and download a mockup. Try a clearer view or a less obstructed area before requesting another processed preview; review any displayed error and credit-return status.
Can I download only the try-on image?
Yes. Use Download mockup or Download preview. You do not have to create a stencil to save a placement comparison.
Preview photo: Female Human Neck, by Elements Of This World, licensed CC BY 2.0. Modified by adding the tattoo preview and resizing; the photographer does not endorse this tool.
Continue with your design
Use the illustrated Tattoo Drawings walkthrough for the complete product workflow, or open the studio with your own idea. Browse all tattoo design guides for related tasks.